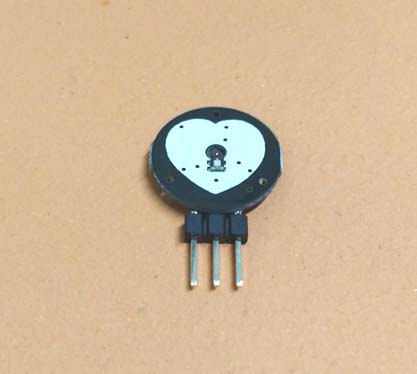
Pulse Sensor
Pulse Sensor Features and Specifications
- Biometric Pulse Rate or Heart Rate detecting sensor
- Plug and Play type sensor
- Operating Voltage: +5V or +3.3V
- Current Consumption: 4mA
- Inbuilt Amplification and Noise cancellation circuit.
- Diameter: 0.625”
- Thickness: 0.125” Thick
Warning: This sensor is not medical or FDA approved. It is purely intended for hobby projects/demos and should not be use for health critical applications.
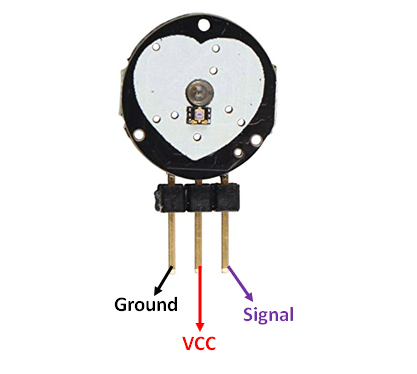
Pin Configuration
|
Pin Number |
Pin Name |
Wire Colour |
Description |
|
1 |
Ground |
Black |
Connected to the ground of the system |
|
2 |
Vcc |
Red |
Connect to +5V or +3.3V supply voltage |
|
3 |
Signal |
Purple |
Pulsating output signal. |
Note: Complete technical details can be found in the Pulse Sensor Datasheet linked at the bottom of this page.
How Pulse Sensor Works
The working of the Pulse/Heart beat sensor is very simple. The sensor has two sides, on one side the LED is placed along with an ambient light sensor and on the other side we have some circuitry. This circuitry is responsible for the amplification and noise cancellation work. The LED on the front side of the sensor is placed over a vein in our human body. This can either be your Finger tip or you ear tips, but it should be placed directly on top of a vein.
Now the LED emits light which will fall on the vein directly. The veins will have blood flow inside them only when the heart is pumping, so if we monitor the flow of blood we can monitor the heart beats as well. If the flow of blood is detected then the ambient light sensor will pick up more light since they will be reflect ted by the blood, this minor change in received light is analysed over time to determine our heart beats.
How to Use Pulse Sensor
Using the pulse sensor is straight forward, but positioning it in the right way matters. Since all the electronics on the sensor are directly exposed it is also recommended to cover the sensor with hot glue, vinyl tape or other non conductive materials. Also it is not recommended to handle these sensors with wet hands. The flat side of the sensor should be placed on top of the vein and a slight presser should be applied on top of it, normally clips or Velcro tapes are used to attain this pressure.
To use the sensor simply power it using the Vcc and ground pins, the sensor can operate both at +5V or 3.3V system. Once powered connect the Signal pin to the ADC pin of the microcontroller to monitor the change in output voltage. If you are using a development board like Arduino then you can use the readily available code which will make things a lot easier. Refer the datasheet at the bottom of the page for more information on how to interface the sensor with Arduino and how to mount it. The schematics of the sensor, code and processing sketch can be obtained from the Sprakfun product page.
Applications
- Sleep Tracking
- Anxiety monitoring
- Remote patient monitoring/alarm system
- Health bands
- Advanced gaming consoles


datasheet
hello!
can anyone provide me datasheet of pulse sensor, so that i come toh know more about its ircitary and sensitivity.